Carrots + Raised Beds = LOVE

0

Posted by Sara | Posted in Outdoor Garden Progression, Outdoor Gardening, Pests and Problems | Posted on 24-08-2011

Everyone knows that carrots love sandy pliant soil. I have tried them for many years with good success in the germination and health of the plant factors, but not so good in the actual root being a nice long carrot factor.

Carrots will turn and get knotty at the least resistance in the soil. You need to provide an easy path for these guys or you will have a knotty twisted mess of a carrot to try to peel!

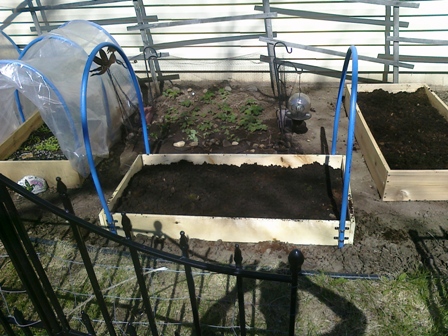
For me the raised bed was the ultimate solution. I built square frames from 8×1 inch remnant wood and created a nice carrot friendly soil in that. I did not have to disturb the other soil which normal veggies can’t handle. I mixed in pearlite, sand, black dirt and manure to make a nice extremely soft bed of dirt for the carrots to go into. I planted straight from seed (which in Minnesota is sometimes not able to get any result because the season is so short). And I have some AWESOME carrots coming up right now because of all my hard work in preparing that bed.

If carrots are royalty then the carrot is the princess. It’s can’t handle any resistance, even deep down in the soil (this is a weak reference to princess and the pea!) πŸ™‚ So, if you’re going to do carrots be prepared, or stick to short varieties.

Hired a Gardener to help me WEED!

0

Posted by Sara | Posted in Outdoor Garden Progression, Outdoor Gardening, Pests and Problems | Posted on 23-08-2011

Tags: , ,

So after letting my vegetable garden get completely away from me I finally hired someone to come help me out.

His name is John Beall (pronounced “bell”) and he did a wonderful job and was very fast as well. Very reasonably priced. We talked about gardening a bit and he had a lot of neat things to share about it. I found him in the gardening services on the Twin Cities Craig’s List here: http://minneapolis.craigslist.org/dak/fgs/2552468878.html

I highly recommend him! Now I can get out there and work on the projects I really want to be doing. Like staking my HUGE tomato jungle! πŸ™‚

Thanks for stopping by!

-Sara

Tomato Supports

0

Posted by Sara | Posted in Outdoor Garden Progression, Outdoor Gardening | Posted on 22-08-2011

Tags: , ,

(I totally should have taken a picture – I might just sneak over to the neighbor’s and do it tomorrow.)

A friend of mine has built himself some awesome tomato supports! He took lath or about 1 inch wide wood and made square cages. They are at least 7-8 feet high (with more to spare under ground I’m sure.) They are awesome. They are sturdy enough to support indeterminate tomatoes which are topping 7 feet high and lots of tomato weight while they ripen and support for the plant and leaves. It looks awesome. Harvesting is easy. The plants COULD NOT be happier! I definitely need to build myself some of these for next year!!!!!

Egg Plant Love

0

Posted by Sara | Posted in Uncategorized | Posted on 20-08-2011

Tags:

I tried a new plant this year – egg plant. I really love it in curry and am adventurous enough to try it other ways as well. I got just one little plant from a local nursery and I am hoping it is a good plant so I can save seeds and see what comes up next year.

this plant produces smaller egg plants and the skin is variegated purple and white (It looks like the globe egg plants in the picture that are variegated but it grows in an elongated shape like a Chinese egg plant . I love the white egg plant because the skin tends to be more tender than the purple. And I love the purple egg plant because well, it’s PURPLE! πŸ™‚ So this little plant has the best of both worlds. Tender skin, and partially purple color. It’s awesome, it tastes great andΒ  for the amount of space it needs it produces a lot of food! I have just 1 plant in my garden which is the size of about 1 very tall petunia and have gotten 3 good-sized egg plants off of it already. (The zucchini grew over it a bit so it wasn’t getting optimal sun all season or I am sure it would have produced more.)

Also note-worthy is that the Japanese Beetles did not touch this plant at all, and even though it was under the zucchini leaves the plant itself did just fine – although a bit stunted. So it is hardy and pest resistant. It gets my vote for a viable food source based on real estate per food ratio, pest resistance, and hardiness under not-so-ideal conditions.

LOVE IT!

Broccoli’s a Bust

0

Posted by Sara | Posted in Uncategorized | Posted on 19-08-2011

Tags:

Well, My broccoli plants are producing but to keep up with the needs of this family we would need a whole lot more than we have. The amount of space this plant takes up for how many florets you get is not very good. So, I will rely on my farmer’s market and our natural/organic local co-op grocery store for that particular veggie.

After all it’s taking up valuable real estate that could be occupied by cool veggies like egg plant! πŸ™‚

Japanese Beetles Strike Again and Solution

0

Posted by Sara | Posted in Uncategorized | Posted on 17-08-2011

Tags:

The Japanese Beetles have struck again. This time they got my morning glories and my pepper plants!

Of all the things to devastate, pepper plants??? I have about 6 bell pepper plants and about 4 jalapeno pepper plants that all stopped producing and started dieing. They didn’t even need to be destroyed. The beetles just being on these plants turned them yellow and caused the leaves to start falling off.

I do my best to stay organic, so I just plucked them off and smooshed them by hand. The plants were too wreaked though. One bell pepper and one jalapeno plant are starting to product again, the rest are done.

So I finally got some milky spore powder. This should kill them all of including grubs within 2 years. It is completely organic as it is found in the soil normally and what you are doing is creating a culture of it in your soil. The grubs of this beetle eat the powder and when they die from it they release even more of it into the soil. Once you create your milky spore culture you don’t need to worry about these pests again!

Just go get enough milky spore powder to cover your area where the beetle were. Make a line grid with cells 3 feet wide and 3 feet long. Water the powder into the soil. You can repeat this in 2 months to get it really good. Within 1-2 years you won’t have these despicable and devastating beetles again.

I went to my local mega hardware store and bought a 20 pound bag. I have yet to spread it as I am just to busy at the moment, but I will let you all know when I do!

Thanks for stopping by!

-Sara

Veggie Garden Expansion!! (Phase 1)

0

Posted by Sara | Posted in Outdoor Gardening | Posted on 22-05-2011

Tags: , , , , , ,

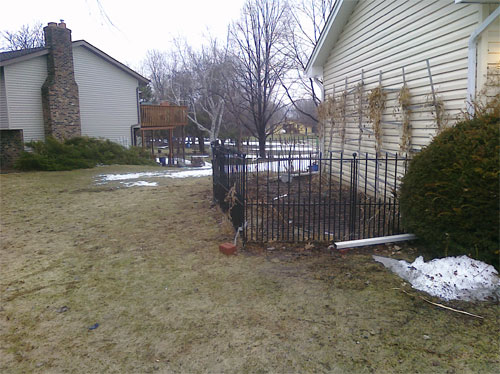
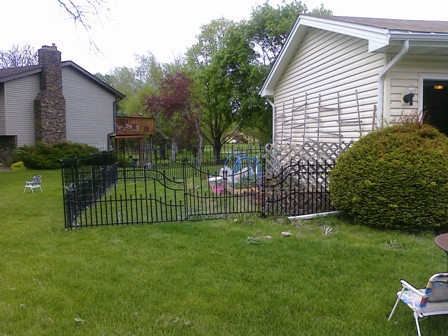
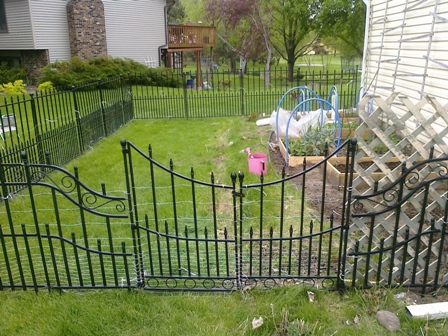
Today I put the perimeter fence around my larger veggie garden! It doubled it in size.

I still have the wrought iron black fence, and rabbit fencing inside. I was short about 5 feet of rabbit fence so I put up some extra lattice I had to block that corner. The rest was cake!

I will have all warm-weather veggies on the new side. Tomatoes (tons), Basil, Cilantro, jalapeno and bell peppers and maybe a few more zucchini plants if there’s extra room. These will all go straight into the ground, not a raised bed since I will be starting them in the greenhouse and putting them out when the weather is warm. (Over 55 degrees F. at night consistently – we see this kind of weather here in Minnesota from about June 1st).

Here are some pictures:

Before:

After:

Before:

After:

Now all I need is a sod cutter – which is proving very difficult to find!!!!!!!!! I might end up hiring someone – I have a few other jobs I could use the help with anyway. This is phase 1 of 3, 1. Fence, 2. Cut Sod and Cultivate Dirt, 3. Plant! πŸ™‚

If you have any questions please leave a comment below or start a thread in the forum!

-Sara

Strawberry Patch Maintenance

0

Posted by Sara | Posted in Outdoor Garden Progression, Outdoor Gardening | Posted on 20-05-2011

Tags: , ,

Hi everyone,

As you know I have a very small strawberry patch. πŸ™‚ Last year it kind of went a little crazy and sent out little shoot off plants all over the garden! (This is a good thing.) So this Spring when those new plants came up I dug them up very carefully and put them back into the strawberry patch. They did not suffer for the transplanting at all and in fact they are going crazy again! I have TONS of blossoms woohoo!!!! They are so happy in there. I already have the bird netting up so that we can greedily have all the juicy berries to ourselves.

Here is a picture from right after I transplanted the babies:

strawberry patch

And here is one from today – approximately 3-4 weeks after the one above:

Yeay strawberries!!!!!!!!!!!!!!

If you have any questions please comment below – or start a thread in the forum.

Thanks for stopping by!

-Sara

Outdoor Bed Progress

0

Posted by Sara | Posted in Outdoor Garden Progression | Posted on 19-05-2011

Tags: , , , , ,

You may have heard that we had our first harvest from the garden the other night!

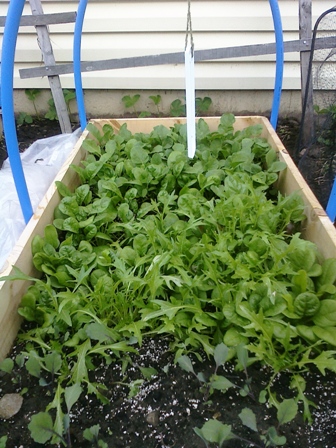
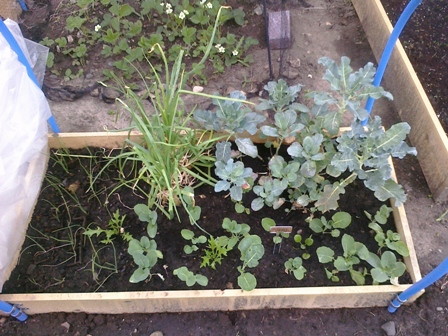
We did indeed! I planted radish, spinach, arugula and other salad greens and cabbage in one of the hoop houses at the beginning of March. Through many opening and closing of the hoop house plastic to maintain 55 degrees they made it through our last two snow falls and flurries with flying colors!

Here are some progress pictures (you can refer back to the original post about just the hoop houses to see what they looked like in March, but I bet you can all envision dirt pretty well!)

Onions and Broccoli - Transplants started Dec 2010 and Feb 2011

Don’t they look great!!! I am so glad that I did this!

If you have any questions please comment below or start a thread in the forum!

-Sara

Hoop Houses – Mini Greenhouses

0

Posted by Sara | Posted in In The Greenhouse, Outdoor Garden Progression, Outdoor Gardening | Posted on 18-05-2011

Tags: , , , , , , , , ,

So, This year to extend my Spring 2011 season and help my fragile ego recover from my major FAIL at building a greenhouse last fall I decided to get some lumber and build mini garden bed greenhouses.

This entailed me first constructing raised beds that were not off the ground, just allowed me to raise the dirt level and then gave me a sturdy structure to secure my metal clasps to for the plumbing plastic pipes I used for my plastic supports.

I used wood pieces from the value wood pile at my local lumber yard. This is junk lumber, normally cut to about 4-6 feet long with knots, or warped. It’s super cheap! I got some outdoor screws, and metal pipe loops, and flexible plumbers pipe – not PVC, it’s a bit more flexible than that. The name escapes me right now.

To construct the beds I just took boards of the same length, cut one in half and then screwed them all together to make a rectangle. I just screwed right into the long end of some of the boards. To make them last a bit longer I would suggest getting smaller 2×2 pieces to put in the corners to screw into. (That’s for the hoop house 2.0 version!) πŸ™‚ I then decided how tall I wanted the hoop to go, and cut 2-3 pieces of the plumbers pipe to fit that. Then I secured each pipe across the bed using 2 metal loops on each side so that they would also be held upright and not tip front and back. After that I cut some of my greenhouse plastic with enough so that it would go about a half a foot over the ground (extra) on all sides. I used bricks to weight it down when I wanted it on and I was then able to have several options of how open or closed I wanted the beds.

I also secured a hanging thermometer in the middle of each bed so I could easily tell the temperature without opening the house itself. These little beds were about 100 degrees in the sun no matter what the temperature was outside when closed up tight!! I tried to maintain a temperature for the plants at about 55 degrees and that worked out just great!

In these beds I have onions, radishes, salad greens of all kinds, broccoli, and carrots. All cooler weather type things. That way if it was going to snow I wouldn’t have to stress out – and it DID snow on these beds – TWICE!!!

Here are some pictures:

Hoop Houses

Inside View

More Hoop Houses and Beds

These houses worked out so well that we just had our first harvest of spinach, radishes and arugula the other night as our dinner salad! See the next post that is coming up!

If you have any questions please comment below!!!!

Thanks for stopping by!

Sara Murray