Veggie Garden Expansion!! (Phase 1)

0

Posted by Sara | Posted in Outdoor Gardening | Posted on 22-05-2011

Tags: , , , , , ,

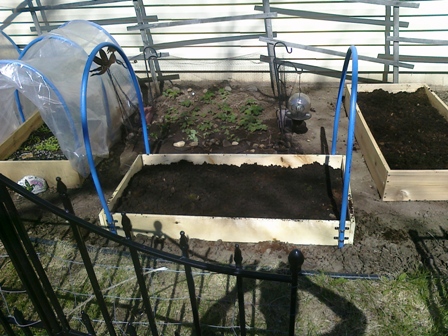
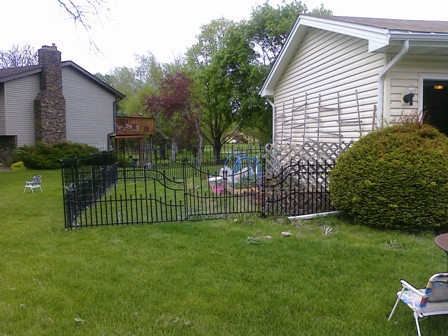
Today I put the perimeter fence around my larger veggie garden! It doubled it in size.

I still have the wrought iron black fence, and rabbit fencing inside. I was short about 5 feet of rabbit fence so I put up some extra lattice I had to block that corner. The rest was cake!

I will have all warm-weather veggies on the new side. Tomatoes (tons), Basil, Cilantro, jalapeno and bell peppers and maybe a few more zucchini plants if there’s extra room. These will all go straight into the ground, not a raised bed since I will be starting them in the greenhouse and putting them out when the weather is warm. (Over 55 degrees F. at night consistently – we see this kind of weather here in Minnesota from about June 1st).

Here are some pictures:

Before:
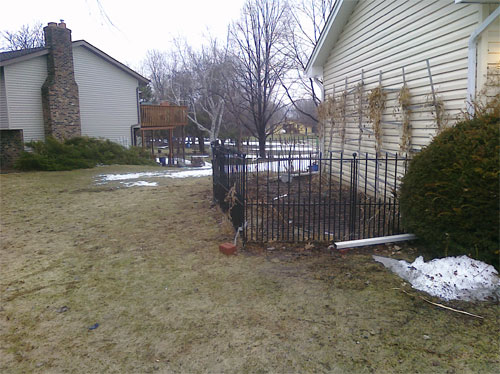
After:
Before:

After:
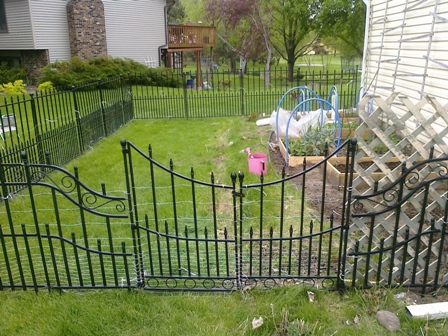
Now all I need is a sod cutter – which is proving very difficult to find!!!!!!!!! I might end up hiring someone – I have a few other jobs I could use the help with anyway. This is phase 1 of 3, 1. Fence, 2. Cut Sod and Cultivate Dirt, 3. Plant! 🙂

If you have any questions please leave a comment below or start a thread in the forum!

-Sara

Strawberry Patch Maintenance

0

Posted by Sara | Posted in Outdoor Garden Progression, Outdoor Gardening | Posted on 20-05-2011

Tags: , ,

Hi everyone,

As you know I have a very small strawberry patch. 🙂 Last year it kind of went a little crazy and sent out little shoot off plants all over the garden! (This is a good thing.) So this Spring when those new plants came up I dug them up very carefully and put them back into the strawberry patch. They did not suffer for the transplanting at all and in fact they are going crazy again! I have TONS of blossoms woohoo!!!! They are so happy in there. I already have the bird netting up so that we can greedily have all the juicy berries to ourselves.

Here is a picture from right after I transplanted the babies:

strawberry patch

And here is one from today – approximately 3-4 weeks after the one above:

Yeay strawberries!!!!!!!!!!!!!!

If you have any questions please comment below – or start a thread in the forum.

Thanks for stopping by!

-Sara

Outdoor Bed Progress

0

Posted by Sara | Posted in Outdoor Garden Progression | Posted on 19-05-2011

Tags: , , , , ,

You may have heard that we had our first harvest from the garden the other night!

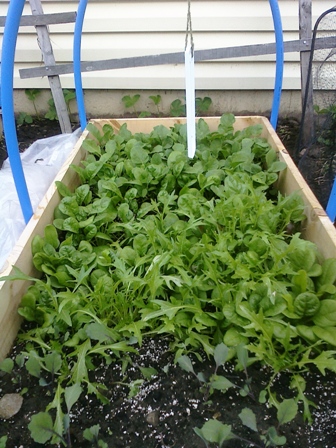
We did indeed! I planted radish, spinach, arugula and other salad greens and cabbage in one of the hoop houses at the beginning of March. Through many opening and closing of the hoop house plastic to maintain 55 degrees they made it through our last two snow falls and flurries with flying colors!

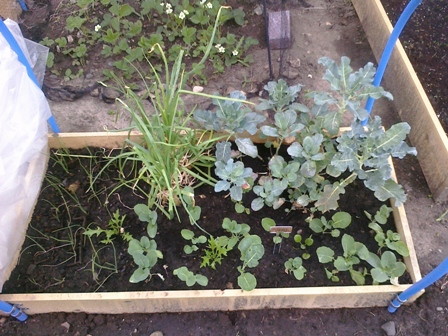
Here are some progress pictures (you can refer back to the original post about just the hoop houses to see what they looked like in March, but I bet you can all envision dirt pretty well!)

Onions and Broccoli - Transplants started Dec 2010 and Feb 2011

Don’t they look great!!! I am so glad that I did this!

If you have any questions please comment below or start a thread in the forum!

-Sara

Hoop Houses – Mini Greenhouses

0

Posted by Sara | Posted in In The Greenhouse, Outdoor Garden Progression, Outdoor Gardening | Posted on 18-05-2011

Tags: , , , , , , , , ,

So, This year to extend my Spring 2011 season and help my fragile ego recover from my major FAIL at building a greenhouse last fall I decided to get some lumber and build mini garden bed greenhouses.

This entailed me first constructing raised beds that were not off the ground, just allowed me to raise the dirt level and then gave me a sturdy structure to secure my metal clasps to for the plumbing plastic pipes I used for my plastic supports.

I used wood pieces from the value wood pile at my local lumber yard. This is junk lumber, normally cut to about 4-6 feet long with knots, or warped. It’s super cheap! I got some outdoor screws, and metal pipe loops, and flexible plumbers pipe – not PVC, it’s a bit more flexible than that. The name escapes me right now.

To construct the beds I just took boards of the same length, cut one in half and then screwed them all together to make a rectangle. I just screwed right into the long end of some of the boards. To make them last a bit longer I would suggest getting smaller 2×2 pieces to put in the corners to screw into. (That’s for the hoop house 2.0 version!) 🙂 I then decided how tall I wanted the hoop to go, and cut 2-3 pieces of the plumbers pipe to fit that. Then I secured each pipe across the bed using 2 metal loops on each side so that they would also be held upright and not tip front and back. After that I cut some of my greenhouse plastic with enough so that it would go about a half a foot over the ground (extra) on all sides. I used bricks to weight it down when I wanted it on and I was then able to have several options of how open or closed I wanted the beds.

I also secured a hanging thermometer in the middle of each bed so I could easily tell the temperature without opening the house itself. These little beds were about 100 degrees in the sun no matter what the temperature was outside when closed up tight!! I tried to maintain a temperature for the plants at about 55 degrees and that worked out just great!

In these beds I have onions, radishes, salad greens of all kinds, broccoli, and carrots. All cooler weather type things. That way if it was going to snow I wouldn’t have to stress out – and it DID snow on these beds – TWICE!!!

Here are some pictures:

Hoop Houses

Inside View

More Hoop Houses and Beds

These houses worked out so well that we just had our first harvest of spinach, radishes and arugula the other night as our dinner salad! See the next post that is coming up!

If you have any questions please comment below!!!!

Thanks for stopping by!

Sara Murray

Greenhouse!!!!!!!!!!!!!!!!

0

Posted by Sara | Posted in In The Greenhouse | Posted on 12-05-2011

Tags: , , ,

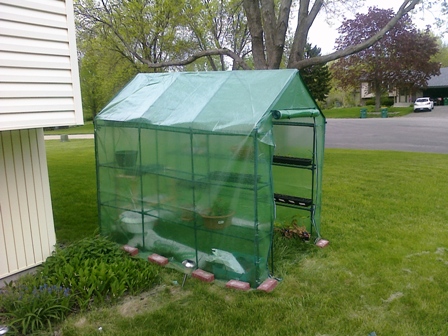
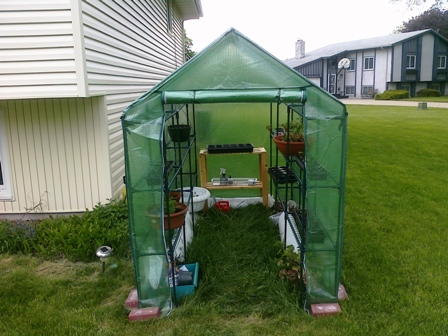
So I finally bought a greenhouse.

Here’s a link to the one I got: http://www.minigreenhousekits.com/5×7-DIY-Greenhouse-Kit

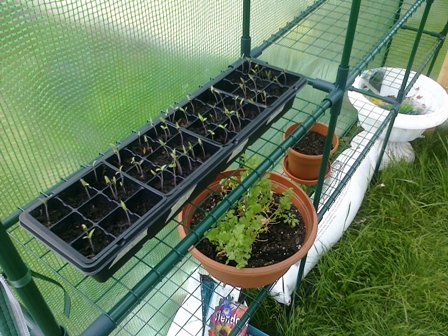
It was VERY easy to put up and it is very sturdy considering it is made of almost 100% plastic! It has metal piping, plastic connectors, plastic outer covering with fabric inside for extra support, and metal shelves that snap onto the shelves after it’s all put together.

It has a vent in the back and the door rolls all the way open. I am still going to need more vents for the height of the summer months. And also a shade of some sort. The manufacturer strongly recommends taking the plastic off in the summer entirely, but I think I can handle it.

It does get EXTREMELY warm in there in the full sun of a 40 degree morning – it can be almost 100 degrees. Let’s hope that translates into at least 55 degrees year round with a small heat source.

It is in my yard in the South East corner at the moment, but I will be moving it up to the deck for the winter. Less area to shovel and a power supply near by make that a necessity in Minnesota! I’ve got BIG plans if it works, and I am pretty confident that it will!!!!

Here are the pictures:

If you have any questions please post below or start a thread in the forum!

Happy Planting!

🙂 – Sara

A Great Book

0

Posted by Sara | Posted in Book Reviews, Indoor Gardening, Outdoor Gardening, Seed Starting, Transplanting | Posted on 09-02-2011

Tags: , , , , , , , , ,

I have a new favorite book!

I think I have mentioned it before but it deserves another mention.

Month-By-Month Gardening in Minnesota!!!!!!!!!!!!!!!!!!!!!!!!!!!!!!!!!!!!! By, Melinda Myers. ISBN-13: 978-1-59186-253-6

ISBN-10:1-59186-253-1

Suggested Retail is $24.99 and worth a LOT more than that!

Here are just a few of my favorite features:

  • It covers every type of plant, veggie or herb and provides month by month instructions for them specifically!
  • In the Veggie and Herb section there is a late planting chart which tells you your last date to plant your second (or a rotation) planting in order to harvest before common Minnesota frost dates.
  • Great seed starting and transplanting dates and what you can put right in the ground in MN.
  • So many “Helpful Hints” and creative suggestions I would have NEVER thought of it could make your head spin!!!

So, if you’re looking for some serious information for Minnesota gardening of all sorts please grab a copy of this wonderful book. I just love looking through it.

Outdoor Seeds Started!!!

1

Posted by Sara | Posted in Outdoor Garden Progression, Outdoor Gardening, Seed Starting | Posted on 30-03-2010

Tags: , , , , , , , , ,

I finally got my outdoor seeds started!

I live in Minnesota so my first day of safe frost-free planting is May 20th this year according to my handy Farmer’s Almanac. There are seeds that you can start outside before that, but not many. I like to transplant plants to the garden for a lot of veggies.

Carrots, tomatoes, and several others can take 75+ days to harvest. With only 3.5 solid months of growing season I need to maximize my garden time, and that means starting from plants, not seeds, for anything that has a growing time of 60 days or more. (You don’t want your first harvest to come during your frost! What fun would it be to not eat anything out of your garden for months?)

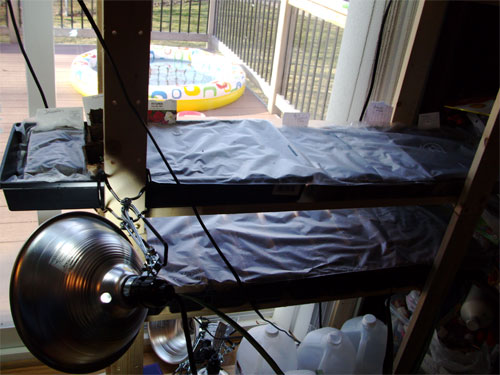
Here is a picture of the seed flats I have started:

I have press-and-seal wrap over the trays to preserve moisture and warmth which will start the seeds faster. I have 2 kinds of trays: small egg-crate style, and large potter style. I use the large pots for things that need to get pretty big before transplant like carrots and tomatoes. I use the small egg crate style for flowers and smaller veggies, and things that can go in the garden sooner size-wise as well as colder-tolerant.

So here’s what I have started:

  • Yellow Onions
  • Long Carrots
  • Jalapenos
  • Bell Peppers
  • Broccoli
  • Beef Steak, Roma, and Salad Tomatoes
  • Petunias (regular ones :))

These I will sow right in the garden:

  • Beans
  • Peas
  • Short Carrots
  • Cilantro
  • Basil
  • Radishes
  • Zucchini
  • Cosmos
  • Morning Glories

These are either fast growers, or cold weather tolerant and do well going right in as seed.

Thanks for stopping by!