Water Your Garden To Protect It From Frost

0

Posted by Sara | Posted in Outdoor Gardening, Pests and Problems | Posted on 17-09-2011

Tags: , , , ,

Watering your garden when there might be a frost seems a little backward, but it will protect your plants.

A healthy well-watered plant will do better than a weaker, drier plant will in cooler night time temperatures. You don’t want the plant to be wet, but you want the Earth to be nice and damp when nightfall comes.

All of the processes that the plant uses to take in water and create food for it’s self take energy. When the plant uses it’s energy to take water and create food it releases a small amount of heat. So a plant that is undergoing this process is slightly warmer inside than a plant that is sitting there doing nothing but drying out.

So water your garden early in the day, and allow the plant’s leaves to be dry by nightfall and you should have some added protection against cooler nighttime temperatures.

Happy Autumn!

Sara

Frost…

0

Posted by Sara | Posted in Outdoor Garden Progression, Outdoor Gardening, Pests and Problems | Posted on 07-09-2011

Tags: , , ,

So, the time has come to discuss the issue of frost and how we (in the North) are going to extend this season and try to get our tomatoes to ripen on the vine!!

Last year I tried to create a greenhouse with greenhouse plastic, PVC pipe and packing tape around my entire garden. It was working great until a wind storm in early October when it all came crashing down and had to be taken down and off of the garden.

This year I plant to eventually pot up the tomato plants that are doing well and put them in the greenhouse! (The actual greenhouse that I bought in the early Spring.) But before I need to do that there are plenty of warm days left. When day-time temps get below 55 I will move them to the greenhouse. Over night temps are sometimes dipping into the 40’s now though.

So, I am going to go to my local hardware store and get some frost cloth. I have my tomatoes on very tall stakes, and I am going to get a few more that are even taller. I will drape the frost cloth over the stakes and hope for the best!! (Pictures coming soon.)

Wish me luck – I still have several dozen tomatoes in the garden, as well as jalapeno and bell peppers, and 4 lovely eggplants I need to save!

Veggie Garden Expansion!! (Phase 1)

0

Posted by Sara | Posted in Outdoor Gardening | Posted on 22-05-2011

Tags: , , , , , ,

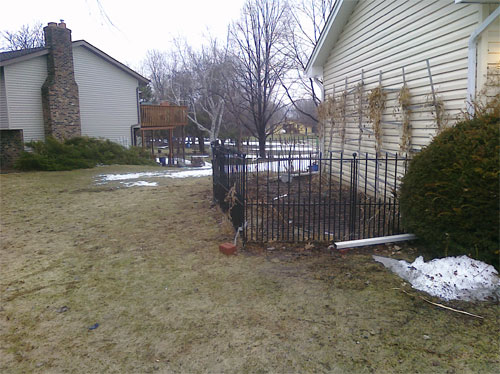
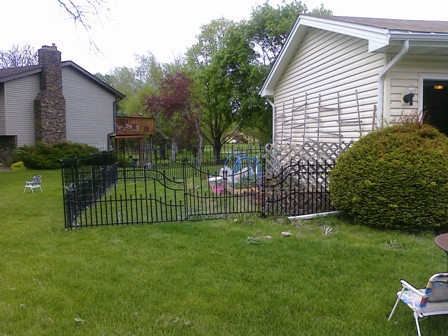
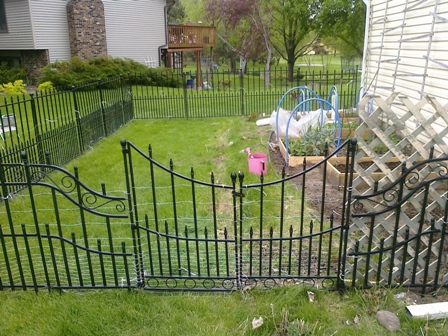
Today I put the perimeter fence around my larger veggie garden! It doubled it in size.

I still have the wrought iron black fence, and rabbit fencing inside. I was short about 5 feet of rabbit fence so I put up some extra lattice I had to block that corner. The rest was cake!

I will have all warm-weather veggies on the new side. Tomatoes (tons), Basil, Cilantro, jalapeno and bell peppers and maybe a few more zucchini plants if there’s extra room. These will all go straight into the ground, not a raised bed since I will be starting them in the greenhouse and putting them out when the weather is warm. (Over 55 degrees F. at night consistently – we see this kind of weather here in Minnesota from about June 1st).

Here are some pictures:

Before:

After:

Before:

After:

Now all I need is a sod cutter – which is proving very difficult to find!!!!!!!!! I might end up hiring someone – I have a few other jobs I could use the help with anyway. This is phase 1 of 3, 1. Fence, 2. Cut Sod and Cultivate Dirt, 3. Plant! 🙂

If you have any questions please leave a comment below or start a thread in the forum!

-Sara

Strawberry Patch Maintenance

0

Posted by Sara | Posted in Outdoor Garden Progression, Outdoor Gardening | Posted on 20-05-2011

Tags: , ,

Hi everyone,

As you know I have a very small strawberry patch. 🙂 Last year it kind of went a little crazy and sent out little shoot off plants all over the garden! (This is a good thing.) So this Spring when those new plants came up I dug them up very carefully and put them back into the strawberry patch. They did not suffer for the transplanting at all and in fact they are going crazy again! I have TONS of blossoms woohoo!!!! They are so happy in there. I already have the bird netting up so that we can greedily have all the juicy berries to ourselves.

Here is a picture from right after I transplanted the babies:

strawberry patch

And here is one from today – approximately 3-4 weeks after the one above:

Yeay strawberries!!!!!!!!!!!!!!

If you have any questions please comment below – or start a thread in the forum.

Thanks for stopping by!

-Sara

Outdoor Bed Progress

0

Posted by Sara | Posted in Outdoor Garden Progression | Posted on 19-05-2011

Tags: , , , , ,

You may have heard that we had our first harvest from the garden the other night!

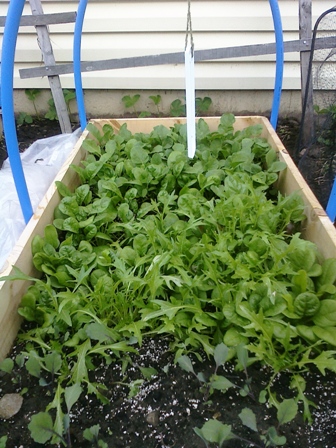
We did indeed! I planted radish, spinach, arugula and other salad greens and cabbage in one of the hoop houses at the beginning of March. Through many opening and closing of the hoop house plastic to maintain 55 degrees they made it through our last two snow falls and flurries with flying colors!

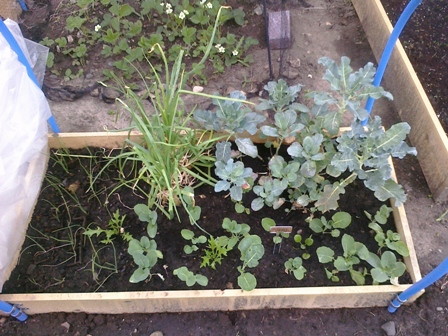
Here are some progress pictures (you can refer back to the original post about just the hoop houses to see what they looked like in March, but I bet you can all envision dirt pretty well!)

Onions and Broccoli - Transplants started Dec 2010 and Feb 2011

Don’t they look great!!! I am so glad that I did this!

If you have any questions please comment below or start a thread in the forum!

-Sara

Hoop Houses – Mini Greenhouses

0

Posted by Sara | Posted in In The Greenhouse, Outdoor Garden Progression, Outdoor Gardening | Posted on 18-05-2011

Tags: , , , , , , , , ,

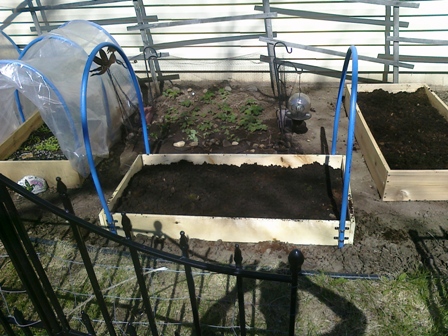
So, This year to extend my Spring 2011 season and help my fragile ego recover from my major FAIL at building a greenhouse last fall I decided to get some lumber and build mini garden bed greenhouses.

This entailed me first constructing raised beds that were not off the ground, just allowed me to raise the dirt level and then gave me a sturdy structure to secure my metal clasps to for the plumbing plastic pipes I used for my plastic supports.

I used wood pieces from the value wood pile at my local lumber yard. This is junk lumber, normally cut to about 4-6 feet long with knots, or warped. It’s super cheap! I got some outdoor screws, and metal pipe loops, and flexible plumbers pipe – not PVC, it’s a bit more flexible than that. The name escapes me right now.

To construct the beds I just took boards of the same length, cut one in half and then screwed them all together to make a rectangle. I just screwed right into the long end of some of the boards. To make them last a bit longer I would suggest getting smaller 2×2 pieces to put in the corners to screw into. (That’s for the hoop house 2.0 version!) 🙂 I then decided how tall I wanted the hoop to go, and cut 2-3 pieces of the plumbers pipe to fit that. Then I secured each pipe across the bed using 2 metal loops on each side so that they would also be held upright and not tip front and back. After that I cut some of my greenhouse plastic with enough so that it would go about a half a foot over the ground (extra) on all sides. I used bricks to weight it down when I wanted it on and I was then able to have several options of how open or closed I wanted the beds.

I also secured a hanging thermometer in the middle of each bed so I could easily tell the temperature without opening the house itself. These little beds were about 100 degrees in the sun no matter what the temperature was outside when closed up tight!! I tried to maintain a temperature for the plants at about 55 degrees and that worked out just great!

In these beds I have onions, radishes, salad greens of all kinds, broccoli, and carrots. All cooler weather type things. That way if it was going to snow I wouldn’t have to stress out – and it DID snow on these beds – TWICE!!!

Here are some pictures:

Hoop Houses

Inside View

More Hoop Houses and Beds

These houses worked out so well that we just had our first harvest of spinach, radishes and arugula the other night as our dinner salad! See the next post that is coming up!

If you have any questions please comment below!!!!

Thanks for stopping by!

Sara Murray

General Indoor Garden Progress

0

Posted by Sara | Posted in Indoor Garden Progression | Posted on 24-03-2011

Tags: , , , , , , , , , ,

The indoor garden is very happy, although not producing much of a harvest.

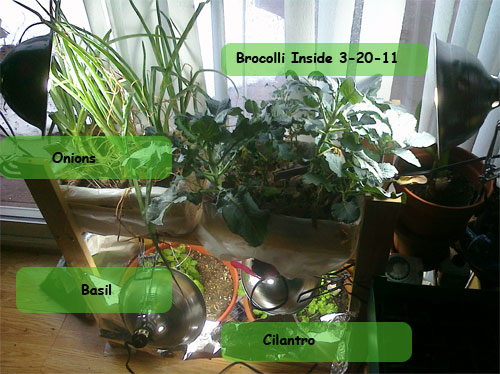
Here is a pic of the Onions, Brocolli, Basil and Cilantro. The Onions and Brocolli were started on September 1st, and have had 14-16 hours of daylight bulbs every single day inches from foliage, plenty of water and no issues or problems. (aside from never producing a flower or bulb….)

The Basil and Cilantro were planted almost a month ago and are doing very well. I even harvested some basil to put in my curry last week and it was delightful! I need to get some tomatoes from the store because I have plenty of Cilantro for a nice batch or two of home made salsa/pico.

Based on this years more expert care, and still it’s inability to produce anything worth while before Spring I am going to limit my indoor garden next year to just herbs and seed starting. 🙂

Thanks for stopping by!

Sara Murray

Indoor Garden Carrot Harvest

0

Posted by Sara | Posted in Indoor Garden Progression, Indoor Gardening | Posted on 22-03-2011

Tags: , , , , , , , , ,

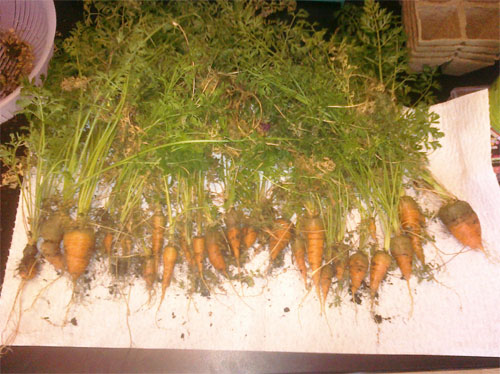
I have to make room to start my seeds indoors, so I have decided to harvest my carrots. These carrots were started on September 1st 2010! I can’t believe it’s been that long. That’s about 200 days. That is a very long time to not have full grown carrots at harvest time.

These carrots got 14-16 hours of daylight bulbs within inches of green foliage every single day, plenty of water, and had no issues or pests. They were developed under the best circumstances and still the largest ones are only about two inches long, and most never made it beyond the starter stage although the foliage was abundant and tall.

Needless to say, there will be no carrots in my indoor garden next winter!

Here’s a pic:

Thanks for stopping by!

-Sara Murray

Indoor Garden Request by my Daughter Madison

0

Posted by Sara | Posted in Indoor Gardening, Seed Saving, Seed Starting | Posted on 03-03-2011

Tags: , , , , , , , , ,

My daughter Maddie suggested that we can use the indoor garden to propagate the strawberry patch!!!!!!!! What a genius idea!

As you may or may not know strawberry plants only produce fruit the first or second year. They send out shoots (like a vine) and plant new plants them selves each season, and those are what give next year’s fruit. In Minnesota, and in a very small area in our garden we only get a handful or so of delicious (and I mean delicious) strawberries each season.

So today at breakfast she says, “Mom, we can have more strawberries if you dry one strawberry, and take those seeds and make plants over the winter.” WOW! Yes, we can!

So, (of course you need to start off with non-GMO and non-Hybrid seeds in order to get plants that come from seed correctly and don’t mutate themselves!) here is a great link for how to store your own strawberry seeds and sow them: http://www.ehow.com/how_2106637_preserve-strawberry-seeds.html

The trick is to find any strawberry plants or seeds that are non-GMO and non-Hybrid! Mine are coming true to plant, so I think I have a good batch. I have yet to try preserving and sowing the seeds though. I tried to google non-gmo strawberry seeds and plants and the general consensus is that there aren’t any. 🙁

(stop reading now because what’s below this is a major downer!)

Thanks for stopping by!

-Sara Murray

(This is a huge tragedy, and if it continues to happen with more and more food seeds we will see the complete destruction of food as we know it and it may lead to a great starvation on this planet! So, please whenever possible use heirloom seeds and buy non-gmo produce and seeds if you can.

50 years ago my daughter and I wouldn’t have had to think twice about if the seeds of any fruit or vegetable would produce more of that fruit or vegetable. Of course they would! Now… you never know.But that’s another blog post all together!) between this and the bees big business and big agriculture can really get you down…

Honey Suckle Bush

0

Posted by Sara | Posted in Outdoor Garden Progression, Outdoor Gardening | Posted on 12-05-2010

Tags: , , , , , , , , ,

Thank you to the bird or rabbit that ate some honey suckle berries and then came to Maddie’s garden! We have had this bush/tree for a few years now and I am going to attempt to train it into a topiary shape this year!

The first year it was going to be a tree = one long stalk/trunk and one sprig of honey suckle at the top. I cut that down to the ground almost. It came back and it brought friends! A little scary at first and I considered pulling it out all together. But honey suckle is such a sweet bush and perfect for a little girl’s garden so I left it.

Each year I prune it aggressively and the next season it comes back fuller. It wants to be very tall so I just cut it down. I think I have enough growth and fullness this year to shape it. In this same garden I have another bush that we call the “monster” bush. It wants to take over the whole garden so we cut it back all the time. And there is a clematis. It is in soil that has not been prepared and used to have several evergreen bushes in it.

I have had the clematis in there for about three years now and it looks like it is finally going to really go!

We call this flower bed Madison Square Garden. She has a lot to contribute about what goes into this garden and always plants an annual border around it which she plants mostly herself and then cares for by watering and weeding herself.

Will post pics later!

Thanks for stopping by!

~Sara