Before transplanting plant sprouts to your garden you will need to harden them if they were in your house or a very sheltered area to start with.
You can do this a number of ways.
- Set them outside for a few hours increasing every day until they can stay outdoors all day and over night.
- Set up a fan in your house.
- Touch your plants and cause some stress for them.
Hardening plants by placing them outside a few hours per day.
When you first start placing your plants outside to harden them make sure that it is a calm day, with temperatures between 50-60 degrees. Any less or more than this will cause the plant more stress and time outside will need to start at a shorter interval and increase more gradually.
Make sure that the first days are spent in an area without direct sunlight. Again, if you have to set your new sprouts in direct sunlight start with a shorter time and increase more gradually.
If you encounter temperatures that suddenly plummet , and are too cold to continue your schedule place a small fan on your plants for the amount of time they would have been outside.
Here is an example of a hardening schedule:
- Day 1 – Water plants, and wait about 1-2 hours for them to soak it up. Well watered plants handle stress better. Place plants outside for 1 hour.
- Day 2 – Repeat the watering and place outside for 2 hours.
- Day 3 – ” ” place outside for 4 hours.
- Day 4 – ” ” place outside for 5-6 hours depending on how they handled the increase yesterday.
- Day 5 – ” ” place outside for 6 hours.
- Day 6 – ” ” place outside for 6-8 hours.
- Day 7 – ” ” place outside for 8 hours.
- Day 8 – ” ” place outside for 8 hours.
- Day 9-14 – Place outside in partial direct sunlight during some of their time, increasing to all the daytime hours. Start watching the night time lows and if they are in the 50’s plan to leave the plants outside some daytime and some nighttime hours. Now we start thinking of this more as giving the plants an indoor break, but they are living outside most of the time now. If you have inclement weather make sure to bring them in.
- Day 14 – Plants can be transplanted at this time or even sooner if they are doing well and liking it outside. I have had plants harden and be happy within one week, and I have had plants which need longer to harden.
- If you notice that your plants are not super happy after they have been transplanted do not worry. You can give them a break under a canopy of a bed sheet if they need a break or if you have an exceptionally windy day.
Setting Up A Fan
- Set up a small preferably oscillating fan near your plants. Turn it on the lowest setting and allow it to blow the plants 1 hour.
- Increase by 1-2 hours per day depending on how they look. Up until they can handle it almost around the clock. You can also turn it up to medium for 1 hour once they can handle the lowest setting to further harden them.
- Refer to the tips and steps at the end of the previous section pertaining to finally transplanting them outdoors. They should be given an opportunity to be outside at least for most of the day and night and have a few breaks indoors before fully transplanting because they also need to be able to handle direct sunlight and temperature changes.
Touching the plants
- Several times through out the day fun your cleaned hands gently over your plants and get them used to some stress. If you do this from the time they are sprouts they will harden faster using the above methods when the time comes.
The younger you can get them out in the wind and sun the hardier they will be.
Also, if your tomatoes start looking very unhealthy remember that you can bury a tomato plant because tomatoes can grow roots from anywhere on the stem. So if they drop some bottom leaves, or are getting tall and unruly just bury that part when you transplant to give them a shorter start making them root deeper and less vulnerable to wind when they are first transplanted.
Happy Gardening!
I just wanted to mention a few things about starting your seeds outdoors in the garden this early.
As I have mentioned before, if you have hoop houses you can start your seeds outside this early. Especially with this nice weather we are having!
There is something to keep in mind though – Most seeds need temperatures in the 60’s to 80’s to germinate. If you have plastic over your hoop houses and it is reasonably air-tight you can expect to reach that if the outside temperature is in the 50’s and the sun is shining on your houses. In fact, it might get much hotter than that in there!
If your outside temps are not quite that high yet, I would suggest germinating indoors and then transplanting as soon as the plants get their second leaves. (You could transplant them as soon as they are up, but if you wait a little bit you might have a better survival rate.)
Once the seedlings have germinated and are green above ground you need to really watch that temperature and make sure it doesn’t get too hot and fry your newly germinated seeds!
So – Keep your hoop house warm/hot until the seeds germinate and then just keep it above freezing. Most plants do well in the 45-55 degree range.
I suggest getting a thermometer and watching that temp. You can record and compare the inside temp with the outside temp, and if it is sunny or not and you will have a good idea what temp it is without having to actually check. I keep the front and back of my houses down with bricks so I can remove them and roll the plastic back to vent on hot days. I have the sides stapled down so they are somewhat air-tight.
I recently bought a remote thermometer which I have not set up yet, but I am excited to use it. It has a temperature/weather station you keep inside, it also monitors the low and high and records it for 7 days! It also has a probe which I intend to place outside, then I will get an outside and an inside reading and I can see what’s going on in there without ever having to go outside!
Thanks for stopping by!
My plans to start some tomato seeds in February did not turn out. 🙂 I now have them all started! Here is a list of everything that went into pots and seedling planters tonight:
- 4 Different Kinds of Tomatoes
- Green Peppers
- Jalapeno Peppers
- Peas (normally right in the ground, but starting just to see.)
- Zucchini
- Eggplant
- Sunflowers
- Sweet Corn
I am excited to be getting the season started! I love this time of year. I feel like everything is laid out for me and I am no longer burnt out from weeding and cleaning out the beds!
I am going to plant outside this week as well. Outdoor night time temperatures are now staying above freezing! I know that in Minnesota that could change very quickly but those hoop-houses really stay warm with the plastic on, so I am going to give it a shot.
In the hoop-houses I will be planting:
- Radishes
- Spinach
- Arugula
- Cabbage
- Onions (these are in I am just going to cover them so they can start up!)
- Carrots (same as onions, although I am going to plant another bed of carrots as well.)
If the weather really does stay warm we will have enough salad greens to make a nice salad by May1st! (Now I need to look back at my posts and see when my first harvest was last year.)
I have another exciting announcement – I will be starting to go “expert” gardener interviews and posting them on the site! I always spot totally awesome gardens and greenhouses around town as I am driving. I hope to have many home gardener videos and stories up on the site very soon!!
Thanks for stopping by!
Ladies and Gentlemen, START YOUR SEEDS!
Imagine planting seeds in the ground in March and having a harvest of cold weather veggies by Easter! If you have hoop houses it is worth a shot!
I live in Minnesota, so I am just now getting things ready to start my seedlings for planting in May and June. However, our weather forecast is saying that by the end of the week we will be in the 50’s with over night temps above freezing! This is a lot like the weather we had all through November last fall. Every year the sun in March is as strong as it is in October, we usually just have a lot of snow pack which keeps things cold until that all melts in April. Normally the *end* of April. Not so this year! (We are in a major drought so let’s see what this summer is like after hardly any snow this winter!)
So, all you folks who know that I had salad greens and cold weather veggies alive and well into November can guess what I am going to be planting now. I have gotten my hoop houses ready for planting. And I am going to use my new remote thermometer to measure the temps (it actually records them!) over night and during the day.
I first used the hoop house/raised beds last spring and had salad greens and radishes very early in the season! In fact, the first day they were all ready and I did my transplants I nearly burnt everything to a crisp! It got to be over 100 degrees in the houses and the outside temp was 45 or something! Overnight temps were not quite above freezing but that did not matter.
So, if you have hoops, or if you were thinking of building some, now is the time!
This week I will be planting:
- Radishes
- Spinach
- Cabbage
- Other Misc Salad Greens
I am also going to check out my onion bed and see how it’s doing. Cover it and see if I can get them to start growing sooner this season. I am also creating/building another onion bed farther in the sun light and see if that makes them plump up faster. I have large yellow onions and I haven’t been able to get them larger than a racket ball yet. 🙂
So! Start your seeds
Please come on back and share your stories and comments below or in our forum. (A lot of my friends email me directly after reading an article here, but it would help me a lot if you posted a comment directly on the site somewhere and I will answer it here and send you an email as well!)
Thank you!
Posted by Sara | Posted in Seed Starting | Posted on 26-03-2011
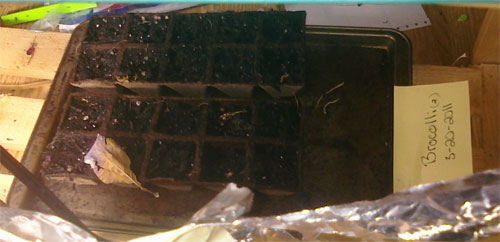
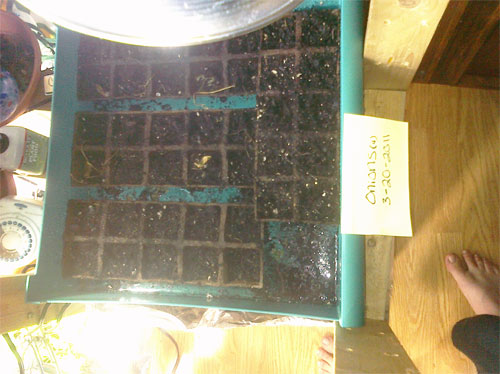
I have finally started my Onion and Broccoli seeds for the summer season 2011! I am way behind on my Onions but I will also sow some right in the dirt and also transplant the plants from my indoor garden which will hopefully then produce a bulb at the base instead of just having happy tops.
Here’s a pic:
My daughter Maddie suggested that we can use the indoor garden to propagate the strawberry patch!!!!!!!! What a genius idea!
As you may or may not know strawberry plants only produce fruit the first or second year. They send out shoots (like a vine) and plant new plants them selves each season, and those are what give next year’s fruit. In Minnesota, and in a very small area in our garden we only get a handful or so of delicious (and I mean delicious) strawberries each season.
So today at breakfast she says, “Mom, we can have more strawberries if you dry one strawberry, and take those seeds and make plants over the winter.” WOW! Yes, we can!
So, (of course you need to start off with non-GMO and non-Hybrid seeds in order to get plants that come from seed correctly and don’t mutate themselves!) here is a great link for how to store your own strawberry seeds and sow them: http://www.ehow.com/how_2106637_preserve-strawberry-seeds.html
The trick is to find any strawberry plants or seeds that are non-GMO and non-Hybrid! Mine are coming true to plant, so I think I have a good batch. I have yet to try preserving and sowing the seeds though. I tried to google non-gmo strawberry seeds and plants and the general consensus is that there aren’t any. 🙁
(stop reading now because what’s below this is a major downer!)
Thanks for stopping by!
-Sara Murray
(This is a huge tragedy, and if it continues to happen with more and more food seeds we will see the complete destruction of food as we know it and it may lead to a great starvation on this planet! So, please whenever possible use heirloom seeds and buy non-gmo produce and seeds if you can.
50 years ago my daughter and I wouldn’t have had to think twice about if the seeds of any fruit or vegetable would produce more of that fruit or vegetable. Of course they would! Now… you never know.But that’s another blog post all together!) between this and the bees big business and big agriculture can really get you down…
I started some petunias from seed this year and I learned a lot about them!
They are picky little things! They need the soil to be very very warm to germinate. So a seed tray warming pad is essential. I thought that most of mine were duds until they sat outside in a 90 degree day and ALL germinated!
They like to be wet all the time and never really dry out between waterings.
I also learned that it takes 6 months for the seedlings to become the small plants you see in the garden centers. Amazing. So they are very slow growing. In order to have petunias for next summer I would need to start seeds indoors around October or November at the latest!!! (Which I intend to do by they way!!!)
Thanks for stopping by ~ Sara
So I was able to harden the seedlings successfully! Normally that’s when I kill things. Generally I forget about them and then they die from over exposure. This time I was meticulous about how much time they were out each day and brought them in properly. The only thing that happened was a little sunburn from starting in a place that was too sunny.
Note to self: Start hardening in a place that only gets a few hours of sunlight per day. The plants get plenty of indirect sunlight even if they are never in direct sunlight.
I have started transplanting them into the vegetable garden today!
I have transplanted the broccoli, and the tomato plants (roma and beefstake). I probably have about 20 volunteer tomato plants out there as well!!! I will wait until they are a bit larger and then thin them out and see what plants came back from the dead tomatoes that were on the ground.
So tomorrow and Saturday I plan to transplant the carrots, peppers, onions and petunias.
Thanks for stopping! ~ Sara