Hoop Houses – Mini Greenhouses

0

Posted by Sara | Posted in In The Greenhouse, Outdoor Garden Progression, Outdoor Gardening | Posted on 18-05-2011

Tags: , , , , , , , , ,

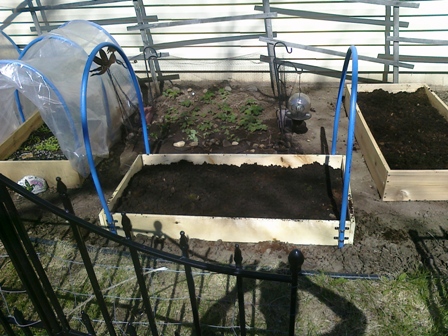
So, This year to extend my Spring 2011 season and help my fragile ego recover from my major FAIL at building a greenhouse last fall I decided to get some lumber and build mini garden bed greenhouses.

This entailed me first constructing raised beds that were not off the ground, just allowed me to raise the dirt level and then gave me a sturdy structure to secure my metal clasps to for the plumbing plastic pipes I used for my plastic supports.

I used wood pieces from the value wood pile at my local lumber yard. This is junk lumber, normally cut to about 4-6 feet long with knots, or warped. It’s super cheap! I got some outdoor screws, and metal pipe loops, and flexible plumbers pipe – not PVC, it’s a bit more flexible than that. The name escapes me right now.

To construct the beds I just took boards of the same length, cut one in half and then screwed them all together to make a rectangle. I just screwed right into the long end of some of the boards. To make them last a bit longer I would suggest getting smaller 2×2 pieces to put in the corners to screw into. (That’s for the hoop house 2.0 version!) 🙂 I then decided how tall I wanted the hoop to go, and cut 2-3 pieces of the plumbers pipe to fit that. Then I secured each pipe across the bed using 2 metal loops on each side so that they would also be held upright and not tip front and back. After that I cut some of my greenhouse plastic with enough so that it would go about a half a foot over the ground (extra) on all sides. I used bricks to weight it down when I wanted it on and I was then able to have several options of how open or closed I wanted the beds.

I also secured a hanging thermometer in the middle of each bed so I could easily tell the temperature without opening the house itself. These little beds were about 100 degrees in the sun no matter what the temperature was outside when closed up tight!! I tried to maintain a temperature for the plants at about 55 degrees and that worked out just great!

In these beds I have onions, radishes, salad greens of all kinds, broccoli, and carrots. All cooler weather type things. That way if it was going to snow I wouldn’t have to stress out – and it DID snow on these beds – TWICE!!!

Here are some pictures:

Hoop Houses

Inside View

More Hoop Houses and Beds

These houses worked out so well that we just had our first harvest of spinach, radishes and arugula the other night as our dinner salad! See the next post that is coming up!

If you have any questions please comment below!!!!

Thanks for stopping by!

Sara Murray
Petunias From Seed

0

Posted by Sara | Posted in Indoor Gardening, Outdoor Gardening, Seed Starting, Transplanting | Posted on 01-06-2010

Tags: , , , , , , , ,

I started some petunias from seed this year and I learned a lot about them!

They are picky little things! They need the soil to be very very warm to germinate. So a seed tray warming pad is essential. I thought that most of mine were duds until they sat outside in a 90 degree day and ALL germinated!

They like to be wet all the time and never really dry out between waterings.

I also learned that it takes 6 months for the seedlings to become the small plants you see in the garden centers. Amazing. So they are very slow growing. In order to have petunias for next summer I would need to start seeds indoors around October or November at the latest!!! (Which I intend to do by they way!!!)

Thanks for stopping by ~ Sara

Transplanting the seedlings :)

0

Posted by Sara | Posted in Outdoor Garden Progression, Outdoor Gardening, Seed Starting, Transplanting | Posted on 30-05-2010

Tags: , , , , , , , , ,

So I was able to harden the seedlings successfully! Normally that’s when I kill things. Generally I forget about them and then they die from over exposure. This time I was meticulous about how much time they were out each day and brought them in properly. The only thing that happened was a little sunburn from starting in a place that was too sunny.

Note to self: Start hardening in a place that only gets a few hours of sunlight per day. The plants get plenty of indirect sunlight even if they are never in direct sunlight.

I have started transplanting them into the vegetable garden today!

I have transplanted the broccoli, and the tomato plants (roma and beefstake). I probably have about 20 volunteer tomato plants out there as well!!! I will wait until they are a bit larger and then thin them out and see what plants came back from the dead tomatoes that were on the ground.

So tomorrow and Saturday I plan to transplant the carrots, peppers, onions and petunias.

Thanks for stopping! ~ Sara

Seedlings looking more like plants

0

Posted by Sara | Posted in Indoor Garden Progression, Indoor Gardening | Posted on 24-02-2010

Tags: , , , , , , , ,

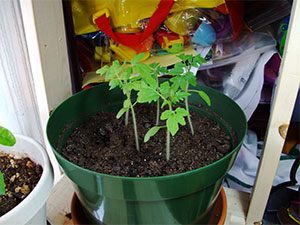
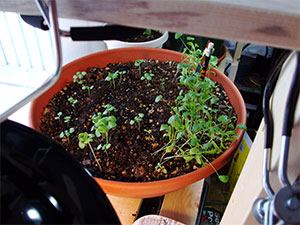
My seedlings for the Cilantro, Basil and Tomatoes have been up for a few weeks now and doing great! The Cilantro is a bit unruly, so I have it staked with the first thing I grabbed which was a pencil and a paint brush! The tomatoes will need to be separated at some point but they are happy together right now. 🙂

These plants I will be saving indoors for the exclusively indoor garden. Seed to table, to see if I can do it all indoors. This will involve my pollinating the flowers myself, which I’m not sure how to do yet. I’m sure Patti Moreno can show me how!

Thanks for stopping by!